
Worried About a Tooth Extraction? Here’s What You Can Expect
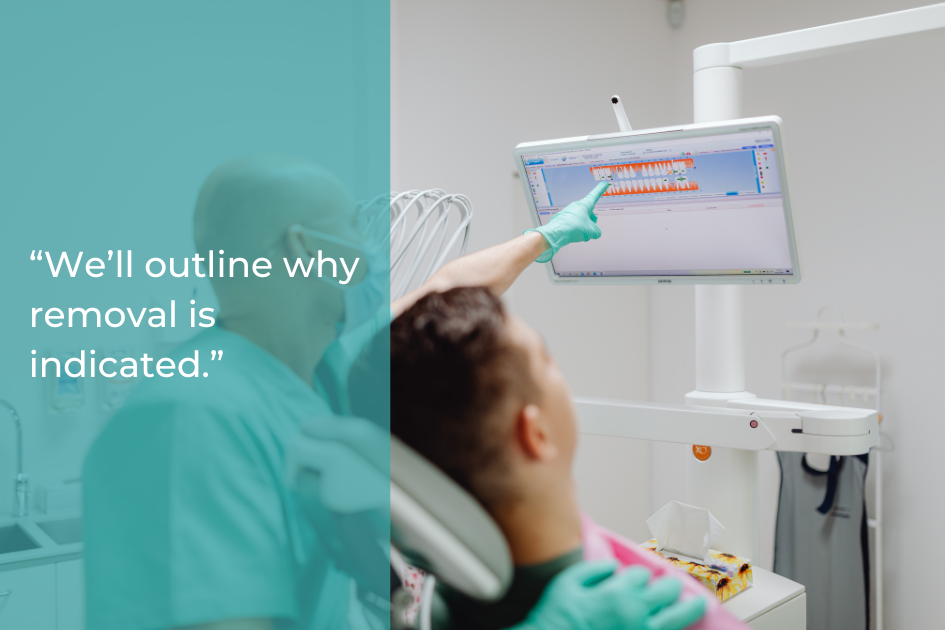
As we prepare for a tooth extraction, we’ll outline why removal is indicated, confirm the treatment plan, and choose anesthesia to keep you comfortable. We’ll describe how we isolate the tooth, release the ligament, and elevate it with controlled force. We’ll cover when surgical sectioning is required, how we protect adjacent structures, and what to expect during closure. Then we’ll move to precise aftercare, pain control, and the timeline that guides safe healing, and what comes next.
Why a Tooth May Need to Be Removed
Although we aim to preserve natural teeth whenever feasible, certain conditions mandate removal to protect oral health. We recommend extraction when decay extends beyond restorable structure, vertical root fractures occur, or a tooth breaks below the gum line, compromising the ferrule and seal. Partially impacted wisdom teeth that cause pericoronitis, crowding, or resorption of adjacent roots also warrant removal. Refractory infections, cysts, or tumors involving the tooth or surrounding bone necessitate extraction to eliminate pathogenic load and enable definitive treatment. When mobility from advanced periodontitis jeopardizes function, we remove the tooth to stabilize occlusion and prevent further tissue destruction.
Your Consultation and Treatment Planning
Before we recommend an extraction, we complete a focused consultation that defines diagnosis, risks, and options. We review your medical history, medications, and allergies, then perform a targeted exam with digital X‑rays or 3D imaging to assess roots, bone levels, fractures, and infection. We classify the tooth’s complexity, evaluate adjacent structures, and identify potential complications. Together, we compare preservation options, restorations, root canal therapy, and periodontal care against extraction indications. We outline the surgical plan, instruments, expected duration, and intraoperative steps, then explain risks, benefits, and alternatives. We also plan timing, needed pre‑op rinses or antibiotics, and your post‑extraction tooth replacement pathway.
Anesthesia Options and Comfort Measures
From the moment we begin, our priority is profound, predictable comfort through tailored anesthesia and adjunct measures. We review your medical history, airway, and anxiety level, then select modalities precisely. Local anesthesia (lidocaine or articaine with epinephrine) achieves pulpal and soft‑tissue numbness. For heightened anxiety, we add nitrous oxide titrated to effect or oral/IV sedation with continuous monitoring (pulse oximetry, blood pressure, ECG as indicated).
We pre-buffer and warm anesthetic for faster onset and less sting, aspirate to avoid intravascular injection, and confirm anesthesia with cold and soft‑probe tests. We supplement with periodontal ligament or intraosseous injections when needed. We employ bite blocks, suction, and calming cues.
Step-by-Step Overview of the Extraction Procedure
With anesthesia verified and monitoring in place, we proceed methodically. We retract the cheek, isolate the tooth, and confirm landmarks on radiographs. We sever the periodontal ligament circumferentially with a periotome, then mobilize the tooth using elevators, applying controlled, apical pressure. Once adequate luxation is achieved, we grasp the crown with forceps and deliver the tooth with slow, deliberate rotational or buccolingual motions. We inspect the socket, remove granulation tissue, and smooth sharp bone as needed. We irrigate with sterile saline, guarantee hemostasis with gauze pressure, and place sutures when indicated. We review precautions and provide written aftercare instructions.
Surgical Techniques for Complex Cases
Although most extractions are straightforward, complex cases demand flap design, bone management, and root-sectioning executed with exacting control. We begin with full anesthesia and a sterile field. We outline a conservative mucoperiosteal flap to maximize access while preserving blood supply. Using a piezo or surgical handpiece, we create a trough to unroof bone selectively, protecting adjacent structures. We section roots along their long axis, elevate each segment with controlled force vectors, and avoid excessive torque. When pathology or thin cortices are present, we curette meticulously and smooth sharp edges. Hemostasis follows with collagen plugs and precise suturing to stabilize tissues.
What Happens Immediately After Removal
Once the tooth clears the socket, we verify hemostasis and socket integrity. We inspect bony walls, debride granulation tissue, and irrigate with sterile saline to remove debris. If indicated, we place hemostatic agents or a collagen plug. We approximate soft tissues and place sutures to stabilize the clot and protect the site. We confirm occlusion doesn’t traumatize the socket. We apply firm gauze pressure and monitor for controlled bleeding. We assess anesthesia level, review immediate precautions, and document findings. If pathology was present, we label the specimen. Before you leave, we confirm stability, comfort, and that you understand the next clinical steps.
At-Home Aftercare and Recovery Timeline
After you’re discharged, we outline a strict 72-hour protocol to protect the clot, control bleeding, and limit swelling. Keep gauze in place as directed, avoid rinsing for 24 hours, and don’t use straws or smoke. Maintain head elevation, restrict activity, and keep the site dry. Begin gentle brushing away from the socket the next day.
Days 3–7, resume saline rinses after meals, advance a soft diet, and avoid probing the site. Expect sutures to remain until we remove them or they dissolve. Weeks 2–4, tissues mature: continue hygiene, avoid hard kernels and seeds, and monitor for foul taste, persistent odor, fever, or increasing pain—then contact us.
Managing Pain, Swelling, and Bleeding
Even with a smooth extraction, we anticipate and control pain, swelling, and bleeding with a structured plan. We dose analgesics on schedule, apply targeted cold therapy, and protect the clot to maintain a stable course. We’ll guide you through precise steps that balance comfort with tissue healing and predictable outcomes.
1) Medications: take prescribed anti-inflammatories and, if indicated, adjunct analgesics exactly as directed; avoid exceeding doses.
2) Ice protocol: 20 minutes on, 20 off for the first 24 hours; keep elevation to reduce edema.
3) Gauze pressure: bite firmly for 30–45 minutes; replace only if necessary.
4) Clot protection: no rinsing, spitting, or straws for 24 hours.
When to Call the Dentist About Healing Concerns
Because most extraction sites heal predictably, we flag specific signs that warrant a call. Contact us if pain intensifies after day two, radiates to the ear or temple, or isn’t controlled by prescribed medication. Call for fever over 100.4°F, foul taste or odor, increasing facial swelling after 48 hours, or persistent bleeding saturating gauze beyond 3–4 hours. Report numbness lasting over 8 hours, difficulty opening your mouth, or drainage of pus. White-yellow fibrin on the socket is normal; exposed bone with throbbing pain suggests dry socket. If a suture loosens, a clot dislodges, or you’re unsure, we’ll assess promptly.
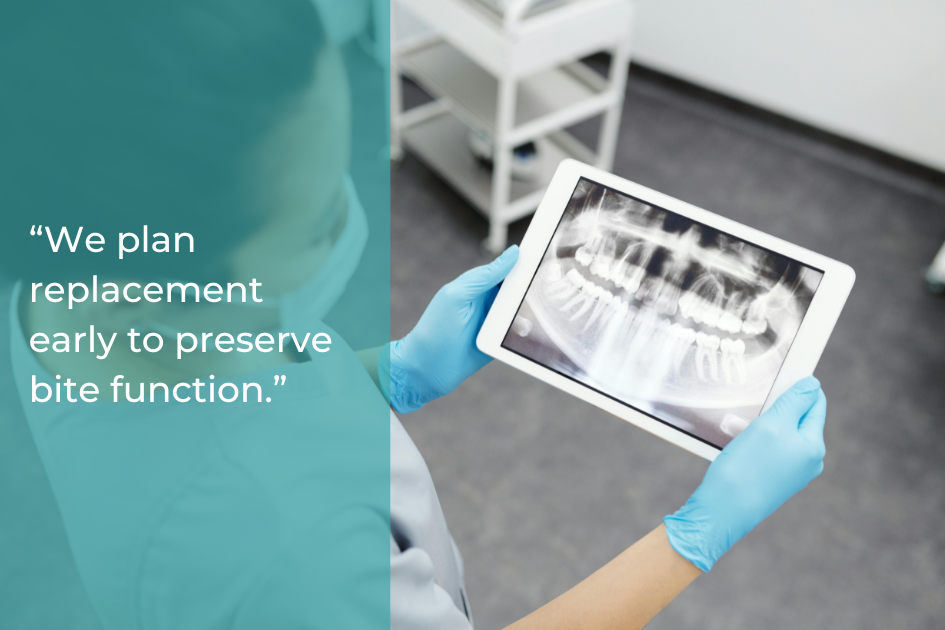
Replacing the Missing Tooth: Implants, Bridges, and More
Once a tooth is removed, we plan replacement early to preserve bite function, prevent shifting, and protect bone. We assess your medical history, bone volume, bite forces, and esthetic needs, then stage treatment to optimize healing and long-term stability.
- Dental implant: place a titanium post 8–12 weeks after extraction (or immediately when indicated), verify osseointegration, then attach an abutment and crown.
- Fixed bridge: prepare adjacent teeth, take precision impressions or scans, and cement a multi-unit restoration.
- Resin-bonded bridge: minimal tooth preparation, bonded wings, suitable for select front teeth.
- Partial denture: removable acrylic/metal framework, adjusted for comfort and phonetics.
Conclusion
As we finish, it’s no coincidence that preparedness meets peace of mind. We’ve mapped why removal is indicated, confirmed anesthesia protocols, detailed mobilization, luxation, and socket inspection, and outlined hemostasis and post-op milestones. If swelling, bleeding, or pain deviates from the expected trajectory, we’ll reassess promptly. Together, we’ll navigate recovery, then plan definitive replacement, implant, bridge, or partial, timed to bone and soft-tissue readiness. Precision at every step guarantees safety, function, and a predictable return to comfort.
For expert care and guidance, trust Pecan St Dental in Pflugerville, TX, to make your tooth extraction and recovery as smooth and supportive as possible.
